Monday, August 03, 2015

Socks, socks, and more socks...

I think something must have snapped earlier this spring... Somehow I managed to convince myself that it would be a good idea to sign up for Tour de Sock. You know, the sock knitting competition where you crank out six pairs of socks, one pair about every ten days. Except since it's a competition, you try to knit a pair in about a day or two. If you want to score any points, that is. (And I do, of course.)

Before the start of the tour, I thought I should knit a warm-up pair because it had been a while since I'd knitted socks in a lace pattern. I also wanted to try adding beads because the odds were there was going to be at least one pair on the tour with beads. I chose Stardust by Adrienne Fong:

On Ravelry
Yarn: Brown Sheep Wildfoote Luxury Sock Yarn
Beads: size 6/0
Needle: 2.5 mm
Hook: 1 mm
Construction: traditional top down, small cables continue at the side of the heel; beads throughout the lace pattern
Thoughts: ok pattern, but I rather enjoyed using beads!

Then I thought I should also try a sock with an unconventional construction, such as a different way of making gusset increases and a heel. Enter Love and Liquor by General Hogbuffer:


On Ravelry
Yarn: Regia Angora Merino, two balls
Needle: 2.5 mm
Construction: toe up, gusset increases at the top, cables wrap around the back to make up the heel
Thoughts: fun pattern to knit, but the fit is not good for my wider than wide feet.

By then I felt like I was properly warmed up and could start the first stage of TdS. The race started with a beautiful twisted cable sock Virrat by TiiQ.


On Ravelry
Yarn: Cascade Yarns Heritage 150
Needle: 2.75 mm
Construction: toe up; gusset increases in the bottom; interesting heel
Thoughts: beautiful sock with an interesting, well thought-out yet no-fuss pattern. Love it!

At this point of the race I was very excited, although a little disappointed that the start times did not coincide with when it would be convenient for me to knit for 12 hours straight. Oh well, there would be stages that start on a weekend morning, right? The next stage got me even more excited with a pattern called Far into the Forest by Kirsten Hall. This was exactly the kind of thing I signed up for!


On Ravelry
Yarn: Cascade Yarns Heritage 150
Needle: 2.5 mm
Construction: toe up; gusset increases on the sides; all kinds of interesting things going on all the time!
Thoughts: Love the socks! This pattern was highly detailed and required a lot of attention to detail the whole time.

At this point I was a little bothered by the fact that the minimum size was quite small, but to place well on the race I would have to knit the minimum. They are quite tight on my feet. Hmph.

Next pattern was called Touring Bubbles. Neither the stitch pattern nor the look of the sock got me excited. But that's ok, I didn't expect every pattern to be perfectly to my liking!


On Ravelry
Yarn: SweetGeorgia Yarns Tough Love (a sponsor yarn that gave me an extra point)
Needle: 2.5 mm
Construction: Top down, nothing exciting.
Thoughts: meh... but the yarn was nice!

Then I started to run into even more timing issues. During the next two stages I traveled back home and although I had lots of time at airports, the leisurely weekend knitting I'd been looking forward to was gone. The next pattern, called From a Distance was knitted mostly at airports and on airplanes. I guess that's somehow fitting...


On Ravelry
Yarn: Malabrigo sock
Needle: 2.5 mm
Construction: Top down with beads, provisional cast-on
Thoughts: Love the socks! however, pattern left something to be desired...

I enjoyed making these and I think they look very nice. On one airplane, as we were deboarding, a British gentleman who had sat next to me commented that he and his wife were "quite impressed" with my knitting skills and that they had never seen anything quite like it! :) However, as the grumblings in the Ravelry group discussions reflected, it appeared that the pattern was not very carefully put together and could have been improved with a bit more attention to detail. But I liked the end result regardless. So thumbs up for stage four!

The next stage left me disappointed. I saw the pattern (Ophidia) and thought "do I really have to knit these?" I did not care for how the sock looked at all. Oh, well, I would knit them and next round would be something more exciting, for sure.


On Ravelry
Yarn: Novita Pikkusisko
Needle: 2.5 mm
Construction: Top down, intarsia contrast stitch, gusset at the back of the leg
Thoughts: ugh...

Right off the bat I ran into issues with yarn. I was traveling, so I had to rely on whatever I had with me. I started the first sock with Malabrigo sock and size M, but it was turning out so small I would never be able to get the sock on my foot. And it was Sunday, and no yarn shops were open. Boo! At the local supermarket I was able to find one yarn that was a suitable weight (a little heavier than Malabrigo). However, it was nasty to knit with, rough and splitty. Also, to get socks that would fit me, I'd have to knit size L, which would preclude me from placing in the stage. I felt defeated, and instead decided to knit  the minimum size, S. The end result was so small that my 11-year-old could hardly get the socks on his feet (which are not big by any means). Some racers were able to get grown-up sized socks out of the smallest size, but I think their gauge must have been quite a bit looser than mine, which was the same as the specs in the pattern. However, it wasn't all negative--two positive things about this pattern were the interesting gusset at the back of the leg, which did cause a very tight fit around the heel, and the contrast stitch, which I'm sure I will use again in something else.

As it turned out, this ended up being my final round of the race. The last stage included a pattern that had a "seam" at the back that to me looked like a mistake or the result of bad planning. I would have liked to fix it by modifying the design a little, but such modifications were not allowed in the race. I decided that five pairs of socks were enough for me this time.

Sunday, May 31, 2015

Thalia

The second shawl/scarf for a wonderful teacher is based on Kirsten Kapur's Thalia.


 I very much enjoy Kirsten's patterns and this one was no exception. The shawl begins from the top center with a double-yarn-over center section. I don't like to keep referring to the pattern the whole time, so I used stitch markers to mark the increase points (there are three plus the edges).


I held the yarn double, but even so the shawl turned out rather small. That's ok though, it'll work well as something to drape on the shoulders or wrap around the neck once.


Pattern: Thalia
Yarn: Isager Strik Alpaca 1, held double
Needle: 4 mm


Thursday, May 28, 2015

Nuku Nuku Nurmilintu

The end of the school year is fast approaching and I needed a couple of gifts for teachers. Conveniently, we were going to take a long road trip over Memorial Day weekend, meaning lots of hours sitting in the car, and a great opportunity to crank out a couple of scarves.

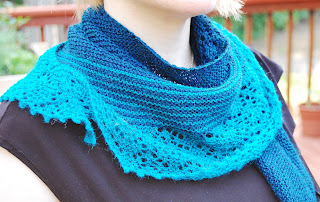
Nurmilintu was actually the second one in the order of knitting, but happened to be the first one I got around to photographing. It was a nice, quick knit--started on Sunday and finished on Wednesday.


 I spiced it up a bit by using two colors. I made the last garter stitch section a little longer, and doubled the length of the final lace section both because I just liked how it looked, but also because I wanted the size just a bit bigger than what it would have been according to the pattern.


Pattern: Nurmilintu ("nurmilintu" is a bird in a Finnish nursery rhyme)
Yarn: Berroco Alpaca Fine, less than one skein of each color
Needles: 4 mm


This package is going to the orchestra teacher as a thank you for making my kid want to be an orchie again! Couldn't thank her enough! (Turns out kids want to be in orchestra when practice is fun, not when they get yelled at. Go figure...)

Sunday, April 05, 2015

Royal

A little girl I know is in need of a princess crown. As are almost all little girls, I believe. Enter Auntie Lotta's royal crown shop:


I browsed crown patterns on Ravelry (there are surprisingly many) but didn't find anything that would fit the bill exactly, so I set out to device my own. I needed it to look enough like a real crown to fit a real princess, but yet be sturdy enough to withstand play and wear. Also, I needed it to fit a 2-year old's head.

I started with a cotton blend yarn, about light sport weight, and added sparkle with a metallic crochet thread. I also wanted to add some bling bling, and decided that the safest way (to avoid a choking hazard) was to crochet in some small beads. If this was for an older kid, I would have added more bling.


Pattern: my own (see below)
Yarn: Premier Yarns Cotton Fair (52 % cotton, 48 % acrylic) and DMC metallic embroidery thread, color light silver. I didn't use the metallic on the first three rounds because I was afraid I would run out--the spool only had 40 yards.
Hook: 3.5 mm
Other: Mod Podge Stiffy; glass or plastic beads size 10 or larger (I used 16 clear and 8 turquoise beads)
On Ravelry: project and pattern


In case you want to make your own royal crown (and who wouldn't??), here is my pattern. As written, this makes a crown with a 46 cm or 18 inch circumference. To adjust the size by just a little, the easiest this would be to adjust yarn and hook size. Otherwise, you can add or reduce pattern repeats. The pattern repeat is 12 s, and the pattern as written has 8 repeats.

Abbreviations: CH chain stitch; SL slip stitch; SC single crochet; DC double crochet; TC treble crochet.
Royal
  1. CH 96s, join in the round with SL.
  2. CH 3s, DC 1 in each of the stitches of the previous round. Join with SL.
  3. Repeat round 2.
  4. CH 5s, *DC 1 in the third stitch of the previous round, CH 2s*, repeat *-* all the way around. Join with SL to the 3rd stitch of the initial CH 5s.
  5. CH 1s, * DC 5 into the next DC of the previous round, SC into the second DC of the previous round*, repeat *-* all the way around. Join with SL.
  6. SL3 (end up at the center top of the first cluster), *CH 7s, SC to the center of the next cluster of the previous round*, repeat *-* all the way around. IF USING BEADS: thread a bead over the metallic thread loop after you pull the SC loop through the center stitch of the cluster. Continue to crochet as usual. I used 16 clear beads on this round.
  7. **EDIT 2/1/2017 (this change was noted in the Errata on the Ravelry pattern page)** SC 7s in the next space. Repeat all the way around. Join with SL to the first SC.
  8. SL3 (end up at the center top of the first arch), *CH 4s, TC into the center of the next arch, CH 7s,  TC into the same center stitch, CH 4s, SC to the center of the next arch**, repeat *-* all the way around. IF USING BEADS: thread a bead over the metallic thread loop after you pull the SC loop through the center stitch of the arch. Continue to crochet as usual.
  9. *SC 4s, SL1 at the top of the TC of the previous round, SC 4s, into the leg of the last SC stitch: **CH 3s, SL1, CH 5s, SL1, CH 3s, SL1**, SC 3s, SL1 at the top of the TC of the previous round, SC 4s*, repeat *-* all the way round.
  10. Weave in ends. Place the crown over a suitable size cylinder or cone (I used a large roll of paper towel covered with a plastic bag). Stiffen with a suitable media, such as Mod Podge Stiffy, starch, or sugar solution. Allow to dry in place. Mod Podge required two applications. If you're not concerned about a choking hazard (children under 3 yrs), you can add more beads or jewels at this point by sewing or gluing.
© 2015 Lotta Kiuru-Ribar;  All Rights Reserved

Saturday, March 14, 2015

New projects

I've been admiring this combination crochet-knit sweater for a while, but there doesn't seem to be a pattern available. I decided to wing it, and come up with my own version. Enter random crochet flowers:


I have a feeling this will be a long term project since I don't have a pattern and not really even a plan to speak of. The extent of my plan is to crochet different flowers until it looks like they might cover half of the front. Beyond that, not sure.

Then I saw February 12's version of Feather and Cloud and I was hooked. Feather and Cloud is a simple sweater with mostly reverse stockinette, and a feather-and-fan border around the front. I quickly ran to the yarn store and grabbed four skeins of Malabrigo Rastita.


Rastita is between a DK and Worsted weight, so skinnier than what the pattern calls for. I will have to do some math to adjust for gauge, as I'm off about 25 %.

Saturday, March 07, 2015

Saturday Update

Pattern: "Jewelry"--my own with some design elements borrowed from Jewel
Yarn: Quince & Co. Chickadee
Needle: 4 mm circular
Feeling: Like it! knitting with the yarn was great, but my "pattern" (or lack thereof) was a pain, and I probably could have knit two sweaters with the effort I put into this, had I just followed a purchased pattern.
Find it on Ravelry.


"Did you check the white balance?"
 
I think blogging about it was part of what got me to finish it, but I also just really needed a new sweater. For the most part I had fun knitting it, but sleeves were starting to get frustrating. Now I'm just glad it's done!

Sunday, March 01, 2015

Progress Report

The Jewelry sweater is off the needles, although not quite finished. But as you can see, I have buttons picked out, so at least it could get finished.


The sleeve detail includes a twisted knit stitch running down the middle and ending with a little bit of the pattern stitch. The sleeves are about 2/3 length, mostly because that's all I had yarn for.


 Now just a final blocking, weave in the ends and sew on the buttons. 

 
I even finished the edging on the Lofty cardigan and started on the sleeve. This shouldn't take long to finish!


Thursday, February 19, 2015

The Benefit Plan

Another benefit of blogging is that it keeps you honest and on task. At least if you share pictures of in-progress work, that is. So here we go--nothing finished, but lots started.

A cardigan from Quince and Co. Chickadee:


I'm calling this one "Jewelry" as it's loosely based on the Jewel cardigan pattern by Kim Hargreaves and the stitch pattern reminds me of some kind of filigree. Progress on this cardi stopped when I lacked the mental energy to start figuring out the sleeves. I wanted seamless set-in sleeves but didn't really have a pattern to go by. So in the basket it went.

Next I started this top-down cardigan from Brooklyn Tweed's Loft. I'm calling her Lofty, of course.


I'm going for an A-line look with pockets in the front.


This one stalled when I needed to graft together the border edging at the bottom. Sigh...


Then I started a vest, and with renewed vim and vigor knit on it like a crazy woman for about a week:


This one is based on a pattern called Drip-Drop by Hanne Falkenberg. Sort of. I tried really hard to get the pattern--her patterns are usually only available as kits, and they are very spendy. But this one is only available in a book, in Danish, from a couple of Danish yarn stores. The cost of the book shipped to Minnesota was going to be well over $100, so I decided to reverse engineer the pattern from pictures. (I usually don't like doing that because I think the designer deserves to get paid for their hard work, but this time getting the pattern was not feasible.) I'm making some changes and adjustments, and I really should finish this before I forget what I did and have to figure it out all over again. However, I'm back a full circle, and knitting the sleeves for Jewelry again (I have knit the first sleeve cap about four times...):


So would someone please kick me in the rear to get some of these finished?

Wednesday, February 18, 2015

A Pretty Picture or a Thousand Words?

I would like my blog to be one of those blogs with beautiful pictures. But when I wait to post until I have the kinds of pictures I want, I end up not posting at all, or waiting a month or two before I post. And although I myself enjoy reading and following blogs with nice pictures, I do also enjoy reading blogs that post at least weekly--I hate waiting for a new post for a month!

Getting good pictures means waiting for the perfect light, waiting to have time to take the pictures during daylight, waiting to have the projects at a stage when you can take good pictures, waiting to have time to edit the pictures... the list goes on. And soon it's two months later and I still don't have good pictures. Oops.

Maybe I just need to accept the fact that I'm going to (and do) have a blog with mediocre pictures. Because at the end of the day, the trade off for having good pictures is posting rarely and therefore having few people reading/following the blog. Because it's more fun to follow blogs that post regularly (and I don't mean the kind of once-a-year regular). But then again, blogs with nice pictures are nicer to look at... what a dilemma!

Today I resolve to allow myself to post with mediocre pictures and mediocre text and we'll see how that goes. Hopefully I will end up posting more often. I work on lots of projects that never make it to the blog because I don't have good (or any) pictures, and because I don't have anything smart to say about them. And because I haven't figured out how to post pictures on the blog from my phone (another thing on the to-do list).

Thursday, January 29, 2015

Toes too!

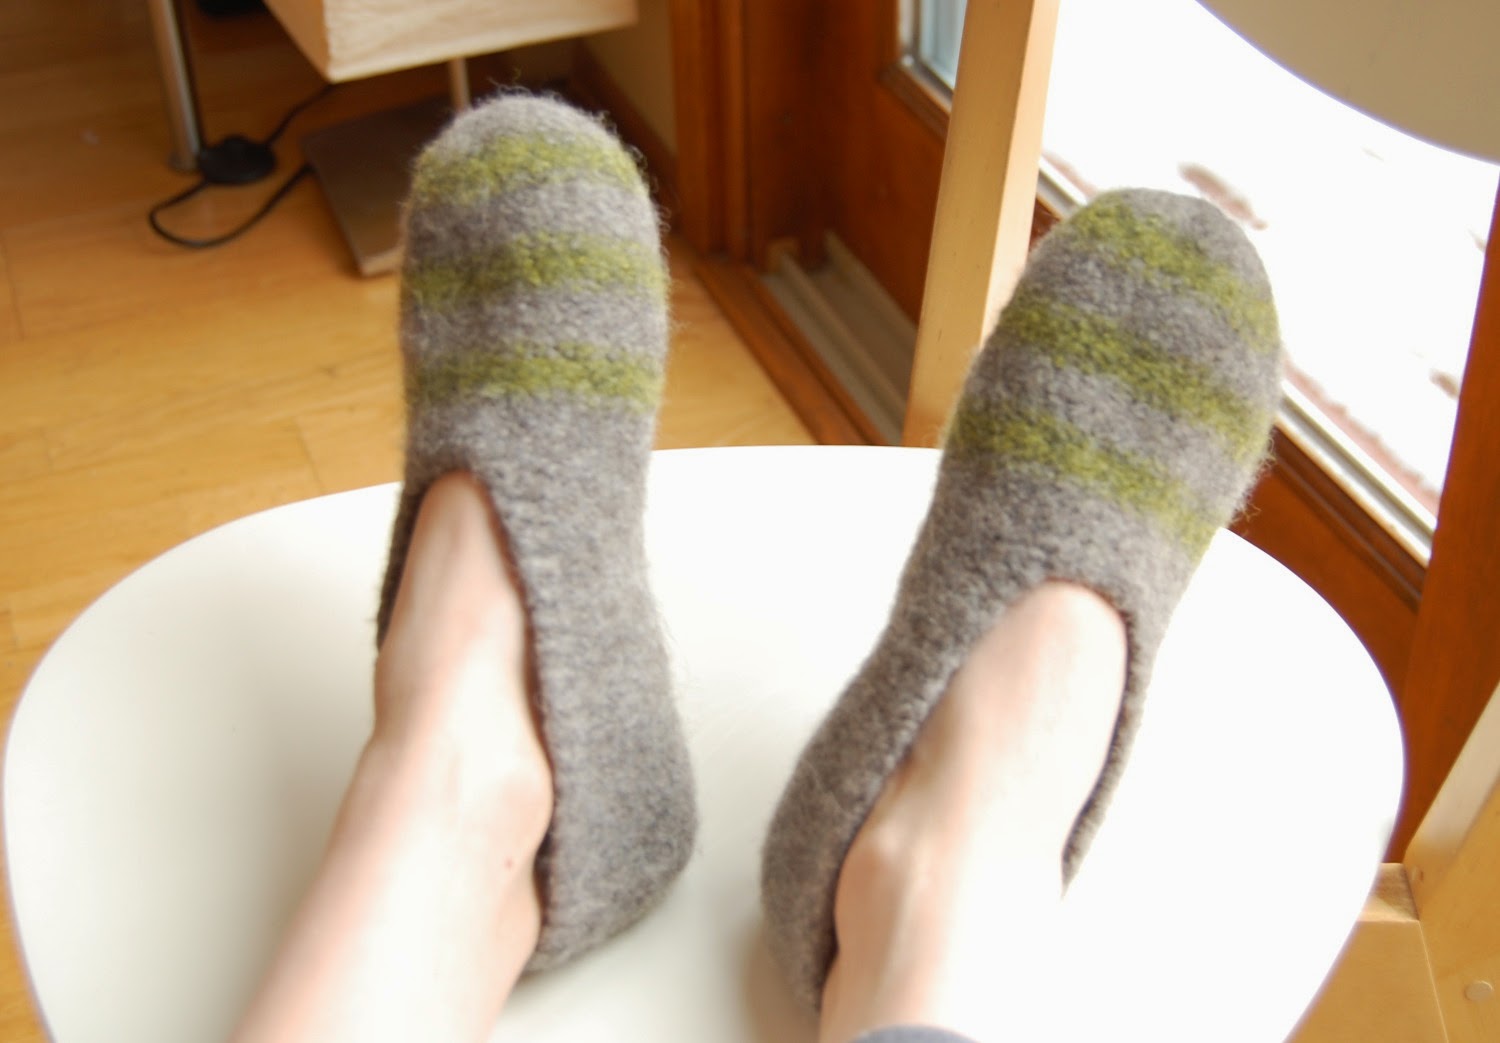
The cold snap we experienced a couple of weeks ago caused a sudden urge to knit something really warm. And to knit it fast! What better project than slippers:


There are still several members of the family that don't yet have these perfect foot warmers. Last winter I started from the bigger end and then lost interest after I made two pairs. This time I started from the middle of the size range and have so far made 2.5 pairs.

I think the "wrong" side looks better than the right side, so I'm turning them inside out.


I'm using my basic slipper recipe, starting with a rectangle at the heel, picking up stitches along two of the edges, knitting until past the opening, casting on a few stitches for the top, and finishing like the foot of a sock. Usually these take a couple of rounds in the washer and a round or two in the dryer to be properly felted.


Yarn: Cascade Yarn eco+
Needles: 6 mm

Monday, January 26, 2015

Keep them warm!

Felted mittens for my husband. These babies were also in the UFO basket for about a year. See a theme here?
 
I think my husband is starting to get the picture that if I start something for him, he can wait at least a year for it to be finished. Oops... (The need to finish these may have had something to do with the need to free up the long 3 mm circular needle... more about that later.)
 

The yarns are random left overs. The greens are fingering weight yarns left over from sweater projects, and the gray is some mystery yarn from my mom. I held the green at the tip double to get a similar gauge as the gray. I felted these with a couple of rounds in the washer and dryer, plus a little bit of hand felting for the top portion to get it down to the right size. All three yarns were rather unprocessed and felted wonderfully to a soft and super warm fabric with a little fuzz.


Yarn: fingering and DK left overs (the dark green was Geilsk Tynd Uld; the lighter one is similar but a different brand)
Needle: 3 mm